Friday, June 28, 2019

Sandpiper: Time To Complete

It took me 7 days to complete Sandpiper.

You may think this is because it was completely thought out before picking up my hook, but this design was no exception, I restarted and re-worked it a couple of times.

I recently started to count how many skeins in I use to complete a design adding in all the frogging and reworking the same yarn over and over. In the case of Sandpiper, it was just a couple of extra skeins used for my designer dead-ends, so, all things considered, it went pretty smoothly!

Nevertheless, one week for such a large project sounds fantastic! But actually, there is no magic in it.

The largest parts of the top, the front and back, are rectangles without shaping.

The stitch patterns are easy to memorize, they use only sc and chains. And they alternate between lace and solid sections divided by a few rows of ribbing – this keeps you interested and doesn't allow you to become bored.

And finally – the yarn – Rios is a worsted-weight yarn, which is so smooth that the rows fly off the hook!


Links:
Sandpiper pattern on Ravelry
Breeze Collection on Ravelry
Breeze Collection Lookbook

Yarn:
Malabrigo Rios in shade Sand Bank

Monday, June 24, 2019

Sandpiper: Name

Every time I am stuck on coming up with names for my designs, I ask for help in the Cup of Stitches group on Ravelry. It is amazing to see how many different associations and word combinations arise, many of which I never would have thought of! Some of the words catch my ear immediately and become the design names.

Photo of the bird © Evan Lipton

Sandpiper was one of these names. When it was suggested, it quickly went to the top of the list for this design. It was a perfect match: the colorway of the yarn and the look of the stitch pattern have so much in common with the spotted feathers, while the longer back mimics the bird's tail!


Links:
Sandpiper pattern on Ravelry
Breeze Collection on Ravelry
Breeze Collection Lookbook

Yarn:
Malabrigo Rios in shade Sand Bank

Friday, June 21, 2019

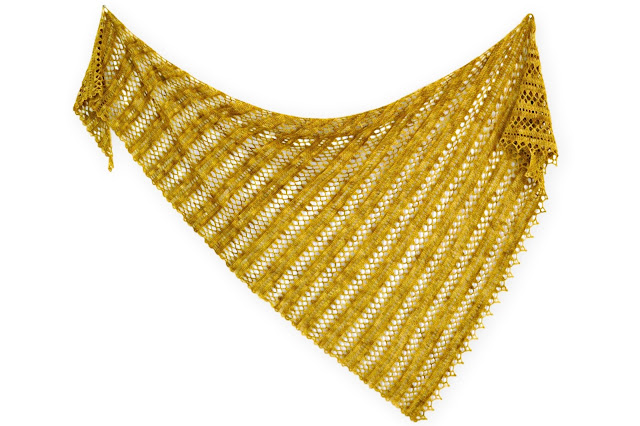
Suncatcher: Three Sizes

Suncatcher is written for three sizes: Small/1 skein, Medium/2 skeins, and Large/3 skeins. This sketch shows all three sizes represented by the color blocks, each color block represents one skein of yarn used.


Here are a few sketches I made to inspire you to play with color. The possibilities are as limitless as your imagination! One color or ten, 2 stripes or 20, the choice is up to you.


Links:


The posts you might like:

Monday, June 17, 2019

Suncatcher: Stripe Options

The Suncatcher pattern includes additional options/charts to create a rectangular shape. These charts were also meant to be useful for giving options on where to change color most effectively when creating stripes.


One of the color options requires switching the colors in an unexpected place to achieve perfect striping. I am talking about ch-5 sps before the first row of 3dc-clusters.

One of two 3dc-cluster rows (the top row of each color section on pic) includes both clusters and ch-5 arches, but the first row of 3dc-clusters is worked differently and consists of 3dc-clusters only.

To achieve a matching arch-and-loop look at both ends of the color sections, the row of ch-5 sps BEFORE first 3dc-cluster row should be included in this color section.

Suncatcher is written for three sizes: Small/1 skein, Medium/2 skeins, and Large/3 skeins. This sketch shows all three sizes represented by the color blocks, each color block represents one skein of yarn used.


Here are a few sketches I made to inspire you to play with color. The possibilities are as limitless as your imagination! One color or ten, 2 stripes or 20, the choice is up to you.


Links:


The posts you might like:

Friday, June 14, 2019

Suncatcher: Design Story

Suncatcher could have looked like this!


I made my first swatch of the shawl using leftovers of Malabrigo Sock in the shade Ochre. I didn't have enough yarn for the entire shawl and picked another shade from my stash, Cereza. It looks super rich and beautiful, doesn't it? I love rich, vivid, and full of life colors so much! But I set it aside anyway, feeling that it didn't look quite right (you probably know that feeling!).

This project could have been buried under the tons of fresh ideas, but one year later I completed this design in the Ochre colorway, exactly as I wanted it to be.

It was pure luck that I had a chance to take part in the Malabrigo Freelance Pattern Project and the collection theme I chose was just perfect to include this shawl's idea and to work it in that beautiful subtle yellow color. Happy birthday, Suncatcher!

Links:


The posts you might like:

Monday, June 10, 2019

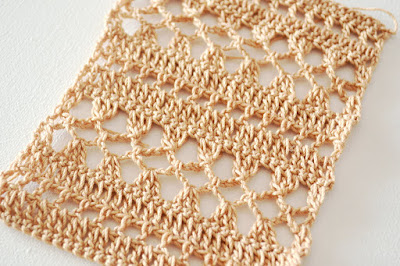
Suncatcher: Stitch Pattern (continued)


The diagonal direction of work I chose fits this stitch pattern perfectly:

1) The increases made along one side are neat and simple.

2) The increases make the shawl enlarge slowly, turning it into a long and narrow triangle, which is one of my favorite shawl shapes: it grows quickly, but it is not as deep as classic shawls and is perfect for wrapping around the neck.

3) With this direction of work, it becomes possible to work the edging along one side as-you-go, creating the neat edge and, at the same time, avoiding turning chains at the beginning of the rows. It wouldn't work or look as nice if I chose a rectangular scarf or a classic triangular-shawl construction.


4) The diagonally-oriented st patt sections are visually appealing and are associated with dynamism, expression, and motion. Perfect for the Breezy mood of the collection!

Links:


The posts you might like:

Friday, June 7, 2019

Suncatcher: Stitch Pattern

I made the first swatch of this stitch pattern more than 6 years ago!


It was not a unique combination of stitches I came up with, it was something I'd seen in the Japanese crochet magazines and was fascinated with. This swatch stayed in my swatch box for years. I regularly go through this box and remove “out-of-date” swatches, but this one always looked promising to me and always felt modern.

During this time I've been wondering what kind of design would best work with this stitch pattern, and this process is not that straightforward as it might seem. The answer “whatever you want!” never works with me when looking at a stitch pattern as a basis of a future design. I see so many possibilities!

At this stage, I start exploring the stitch pattern and this can actually take years because the exploration happens here and there, a bit at a time.

Besides the general features, like lace, solid, textured, etc., when creating a pattern from a swatch, I need to keep in mind: the different stitches used, are there rows of different heights, if it is made of several stitch patterns (like this one, which alternates between lace and solid st patt sections) and each of these st patts may have different stitch repeat. For example, in this sample, it is a multiple of 2 sts in the solid section and a multiple of 4 sts in the lace section.

This information helps to determine the ways increases and decreases can be done, and different shapes can be achieved, as well as the different ways border stitches can be dealt with to easily achieve neat edgings. After this research has been done, some options are not as promising as before. And finally, I find one, which is working up so smoothly, easily, naturally, that it becomes clear that the stitch pattern should be treated exactly this way. [to be continued]

Links:


The posts you might like:

Tuesday, June 4, 2019

Suncatcher: Yarn


Suncatcher uses Malabrigo Sock in shade Ochre. This colorway is absolutely amazing and looks very natural and smooth even in tall crochet stitches.

I had three skeins to make the largest size of the shawl and each of these skeins had slightly different color saturation: same color, but each a little bit lighter or darker than the others.

Despite my belief that this color shift would be barely noticeable (if at all), I still wanted to minimize the difference (even if nobody knows, I know that it is different). I didn't want to alternate the skeins and complicate the process, so I waited for daylight* and then simply arranged the skeins in order from light to dark to ensure the colors flowed evenly.

If I had used the lightest and the darkest shades next to each other, maybe there would have been a noticeable color shift, but having the skein with the average color saturation in between them solved this issue.

*There were a couple of times when I started a new project in the evening and could work on it only at night. This taught me to never ever do this again when using hand-dyed yarns and always wait for daylight. You'll notice the difference in color (of the skeins) too late.
Links:


The posts you might like:

Related Posts Plugin for WordPress, Blogger...

Printfriendly

Related Posts Plugin for WordPress, Blogger...