Monday, July 29, 2019

Amanita Wrap and Reversible Dotty Stitch Pattern Variations

Amanita Wrap, originally published in Crochet Now magazine, Issue 20, is now available in my pattern store on Ravelry. The pattern has been tweaked a little, updated, and now uses U.S. crochet terminology.


This design uses the same stitch pattern as the Dotty cowl, but this time it is worked flat in rows. You will crochet a basic rectangle, then fold in the corners and seam along the row edges to create the arm openings.

The stitch pattern is reversible; there's no wrong side, which allows you to wear your cardigan with either side facing out and only dependent on whether you prefer the main color or contrasting color to be dominant today.


Please bear this in mind if you'd like to substitute yarn: whatever yarn weight you choose, the fabric will be almost twice as thick. It is also suggested, for optimum drape, to work loosely and use a larger hook than would normally be used for your chosen yarn.


This stitch pattern is perfect for playing with color options and allows you to create your own unique design. It looks great in many combinations, for example:
- two solid colors
- one solid and one multi-color (or gradient) yarn
- two different variegated yarns.

You may even pair several colors together in this project by dividing the rectangle into several sections and using different colors for each section – it can be one color chosen to be dominant for one side and multiple colors for the other side or each section of the rectangle may use two different colors. Here are a few examples of the right and wrong sides to give you a better visual idea.


Friday, July 26, 2019

Dotty Cowl: Free Pattern And Tutorial

I am very excited to let you know that the Dotty Cowl, my recent collaboration with Malabrigo, is available on Ravelry and is free!


The cowl is worked in the round and uses a reversible stitch pattern; there’s no wrong side, which allows you to wear your cowl with either side facing out. The colors take turns being dominant and produce a unique look on each side, with one side being a negative of the dotty pattern on the other side.


The yarn is Malabrigo Sock in the shades Sand Bank and Fortaleza. The Dotty cowl uses one skein in each color to create an optimal size cowl, 29” (74 cm) in circumference and 12½″ (32 cm) tall, with very little leftover from each skein.


The photo tutorial below should give you a better understanding of the Reversible Dotty stitch pattern used in the Dotty cowl and Amanita wrap patterns and explain the key elements of it.

Wednesday, July 24, 2019

Ozone: Finished Size

Here is a modeled shot of the Ozone cowl to give you a better idea of its size! Typically I make my cowls 27½-31½'' (70-80 cm) in circumference because this way I can wear it over my head as well (I am not a hat wearer!).


Links:
Ozone pattern on Ravelry
Breeze Collection on Ravelry
Breeze Collection Lookbook

Yarn:
Malabrigo Worsted in shade Water Green

Monday, July 22, 2019

Ozone: Shape

Among all my designer's reminders, mottos and mantras this one is probably the hardest and most ambiguous: Have fun! 

It is a pure joy to start bringing to life some not-serious lightweight ideas, but forgetting about all the responsibilities, commitments, deadlines, precious yarn, etc and just let yourself go is another challenge!

So along with my weekly Swatch Day, I have a reminder “Have fun” randomly set in my yearly planner just in case I forget about it and get bogged down in work.

This time I had fun with the cowl's shape and moved away from the regular tubular shape by adding a flirty triangular edging/corner made with the help of short rows.


Links:
Ozone pattern on Ravelry
Breeze Collection on Ravelry
Breeze Collection Lookbook

Yarn:
Malabrigo Worsted in shade Water Green

Friday, July 19, 2019

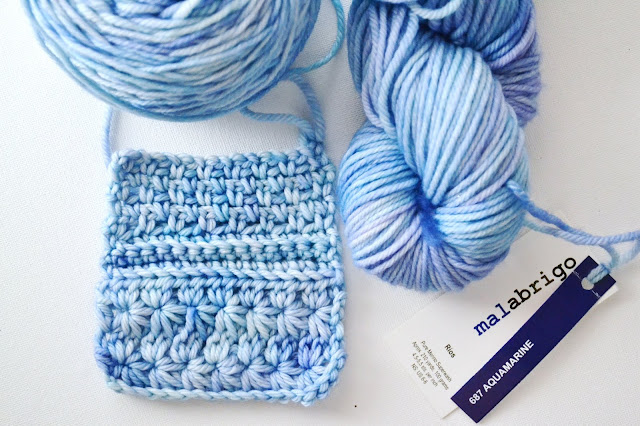
Ozone: Yarn and Swatches

When I was working on the Breeze collection, I had five projects on my hooks at one time and generally, when it comes to prioritization, I start with the most difficult ones, like garments.

I work on them until I determine that the idea is worth executing and my calculations are correct, then the hard work is done and I can slow down and switch to another project. But this time I changed tactics and started with the simplest idea, just because I was so curious about the yarn, which I'd never tried before.

The yarn is Malabrigo Worsted in shade Water Green and it crochets as smoothly as butter!

My pre-swatch was worked in lace-weight yarn held double (Malabrigo Lace in shade Cadmium).

Malabrigo Lace held double
I wasn't sure it would turn out as nicely in worsted weight, but I'm totally loving the result!

Malabrigo Worsted

The stitch I considered as the most boring, uninteresting and featureless, the single crochet stitch, is turning out to be my favorite. It took me ten years to make out its versatility and understand how powerful its potential is.

The stitch pattern in the photo uses sc sts and chains.
Links:
Ozone pattern on Ravelry
Breeze Collection on Ravelry
Breeze Collection Lookbook

Yarn:
Malabrigo Worsted in shade Water Green
Malabrigo Lace in shade Cadmium


Monday, July 15, 2019

My Weekly Swatch Day

One day of my working week is dedicated to stitch pattern research and crocheting swatches.

Spending time on crocheting something I don't need at the moment while having so many interesting projects in progress seems like wasting time and I always have to push myself to do this, but it's an important part of the designing process. To try something new, to learn new stitches, combine different stitch patterns, or invent something unusual. One of the hardest, boring and unwanted tasks for me which actually matters the most!

In the photo: a combination of star stitch, ribbing in back loop and linen stitch pattern.

I changed my attitude to such tasks as swatching and weaving in ends as soon as I decided to start thinking of them as essential parts of the whole crocheting process. Before that, I thought of these as separate tasks, and “crocheting” was only the time I spent with a hook and yarn in my hands.  This little change made a big difference and changed my feelings about the amount of time it takes to create a project, making the whole process less stressful and more enjoyable.

I lost the feeling of impatience and hurry during the swatching process because swatching means I'm already working on my project: I can see the beauty of the stitch pattern and how well it works with the yarn, visualize how the entire design will look and make sure that the sweater will fit my figure and I won't run out of yarn, all because I made and blocked the swatch, which allowed me to calculate yardage and measure the proper gauge.

And I stopped having a feeling of accomplishment right after working the last stitch. While I still have the ends to weave in and need to block the finished item, it is still a project in progress. The pseudo-finished project no longer taunts me since it's not considered finished until it is truly finished, with all its ends woven in and it's off the blocking mat; that's when the feeling of accomplishment comes!

Friday, July 12, 2019

Sandpiper: Joining

Probably the best thing I've learned since becoming a crocheter, something which completely changed everything, is the join-as-you-go method (check this post for more details and a tutorial!).

I'm using the motif from When Skies Are Grey pattern by Yuliya Tkacheva
The ability to join motifs right in the process of making them was overwhelming and amazing. I immediately switched to this method! Joining as-you-go can be done in many different ways, each of which gives a different look, and as I encounter new joining challenges, I keep discovering new possibilities.

In Sandpiper design, the seamless method is used for joining the sides. Since the front and back are different lengths and not joined completely in order to create side splits, the joining and the split edging are combined/worked at the same time.

You'll start at the bottom of either the front or back and create a neat edge by working into the border stitches up to the bottom of the armhole. When you come around to the bottom of the armhole again (now working on the opposite side, back or front), you'll continue edging from top to bottom and join it with the other side's edging stitches at the same time. When the joining is complete, you'll proceed without joining to the end.

I love how tidy it looks: the edging of the splits, the flat delicate seam, and how clever it is to be able to work a two-in-one: edging and joining at the same time.

Links:

Sandpiper pattern on Ravelry
Breeze Collection on Ravelry
Breeze Collection Lookbook

Yarn:
Malabrigo Rios in shade Sand Bank

Monday, July 8, 2019

Sandpiper: Modifications


Sandpiper allows the crocheter to easily create custom sizing because it is made of two rectangular pieces with no shaping.

You can change the width by working fewer or more pattern repeats across the front and back pieces.

The circumference of the sleeves, as well as the armhole depth, is determined by the number of stitches you pick up around the armhole.


The only caveat to this simple custom sizing is the length. If you want to make your top shorter, you should bear in mind that you cannot reduce the number of rows in the Lace or Ribbing sections. The only adjustable element is the number of rows in each Linen section. By making this section shorter it is possible to change the length of the top. You can also skip the last one or two Linen sections or even combine both methods: skip an entire section and add more rows in the remaining Linen sections to add back some of the length removed so the overall look and length are what you prefer.

Links:
Sandpiper pattern on Ravelry
Breeze Collection on Ravelry
Breeze Collection Lookbook

Yarn:
Malabrigo Rios in shade Sand Bank

Friday, July 5, 2019

Sandpiper: Shape


Sandpiper features a drop-shoulder construction; it is worked from the top down in two pieces (front and back) and seamed at the shoulders and sides.

The fit of a drop-shoulder sweater should be oversized and my main design task was to avoid having it look heavy and boxy.

I tried to balance its simple shaping and create a more figure-flattering delicate appearance, as far as that is possible for long boxy tops, by using a mix of solid and lace stitch patterns; the lace brings airiness while the large horizontal stripes give an overall thinning appearance and also add visual interest, which keeps the eye moving.


And finally, I wanted it to be long in order to create the illusion of an elongated thinner rectangle, so I put the hem of the front and back each on a different level, which visually lengthens the silhouette.

Links:
Sandpiper pattern on Ravelry
Breeze Collection on Ravelry
Breeze Collection Lookbook

Yarn:
Malabrigo Rios in shade Sand Bank

Wednesday, July 3, 2019

Hairpin Lace Crochet: New patterns and a CAL/KAL!

Two years ago, two of my hairpin lace designs were published in Crochet Now magazine. The theme for that issue was Beachcomber and I can't think of a more summer-ish crochet technique than hairpin lace. It is so quick and simple, relaxing and mindful, and results in a beautifully airy fabric full of drape, which is just perfect for summer!


Monday, July 1, 2019

Sandpiper: Yarn

The first yarn I started exploring Malabrigo yarns with was Malabrigo Silkpaca. It is a lace-weight yarn, soft as a cloud, thin and silky. At that time, the largest hook I had ever used was 3 mm.


Six years later, my love transformed and became much larger :) Rios, worsted weight, is one of the yarns I prefer most of all now. Typically I use a 5-6 mm hook with it.

I've been thinking a lot about this change and feel I have found the answer as to why it came to be: the crux of the matter is the stitch patterns I used before versus the ones I use now. They are so different!

Tall stitches, fans and bobbles look so lovely in lace yarn (before); however, short stitches and textured patterns (now), seem to scream for a heftier yarn to highlight their beauty.

Being worked in lace-weight yarn, these short or textured stitches would lose part of their charm because these small stitches become even smaller and flatter.

'Nothing is absolute. Everything changes, everything moves...'


Links:
Porcelain Berry shawl pattern on Ravelry
Sandpiper pattern on Ravelry
Breeze Collection on Ravelry
Breeze Collection Lookbook

Yarn:
Malabrigo Silkpaca in shade Polar Morn
Malabrigo Rios in shade Sand Bank
Related Posts Plugin for WordPress, Blogger...

Printfriendly

Related Posts Plugin for WordPress, Blogger...