Wednesday, December 31, 2014

PROJECT: Happy New Year!

We had a great crochet year and enjoyed your lovely company. We hope the new year will be just as good or even better! Happy 2015 to you and yours!

MsWeaver's Christmas Granny Placemat

Tuesday, December 16, 2014

CROCHET-A-LONG: Stage 1 (Choosing the Project)

Come and join our fun new Crochet-A-Long in the Cup of Stitches group on Ravelry!

Temperature CAL means that each day you crochet one row of your chosen project in a color which is assigned to that day's temperature. Depending on temperature fluctuations in your area, you can choose smaller or larger ranges and pick a colour for each range.

Another option (great for those who love shades of blue!) is to use the yarn which matches the color of the sky each day.

At the end of the year (or your project, because you can stop whenever you reach your desired size) you will get a masterpiece created by both you and nature.

The following is a list of eligible patterns from the Cup of Stitches partnership:

1. Happy Day Bracelets (easy Slip-Stitching)
2. Color Therapy (easy Tunisian crochet)
3. Tunisian Shell Blanket (Tunisian crochet, but regular hook!)
4. Purple Gold Scarf (fairly easy Tunisian crochet) 
5. Jazzy Patchwork Blanket (more advanced Tunisian crochet)
6. Sea Wave Afghan (regular crochet, free pattern)


If you don't have these patterns yet, you can buy them from Lena's or Yuliya's stores (as applicable) and get 25% off the price with temperatureCAL coupon code (valid through December 16, 2014 - January 6, 2015).

The CAL will officially start on 1 January, 2015, for those who want to have a whole year's temperature representation in their project. Depending on the pattern you choose, you can also go month by month (with smaller projects), or season by season, or any other meaningful to you period of time.

In the meantime, join our friendly company, share your ideas, plans, yarn and color choices with us! 

Wednesday, December 10, 2014

PATTERN RELEASE: ZigZag Blues Cowl

by Yuliya Tkacheva MsWeaver

It is probably no secret to some of you that I am not a monogamous crocheter. I can't stick to the same crochet technique for too long and I am rather promiscuous when it comes to crochet methods. Well, let me introduce you to my new passion: post-stitch crochet!


I doubt it really is considered a separate crochet technique as such, but I do think it should be, since the fabric crocheted working around stitch posts, rather than in their tops, looks and feels completely different to regular crochet and has a different structure. It has this unique woven look and, if you work in the round with the right side always facing, it is also perfectly balanced and symmetrical. No diagonal biasing or alternate “wrong side" rows!

After working a few rounds you feel like crocheting around the posts is the only natural way to crochet. Why would anyone even consider such nonsense as crocheting in the tops of the stitches?! (Only joking!) Having said that, you do need to be careful with your yarn choice, since the resultant fabric can be very bulky when crocheted with thicker yarn. 

The cowl pictured is my new design, ZigZag Blues, which uses this method. Alternating front post stitches with back post stitches creates a wonderfully subtle, yet gorgeous texture.

The pattern is both written out and charted. You can easily adjust the size to your liking by changing the number of horizontal and vertical repeats.


And if you are a Cup of Stitches Ravelry group member, there is a special offer (valid until 11 December, 2014) exclusively for you in the announcement thread!


Thursday, November 27, 2014

PATTERN RELEASE: Merezhka Top

by Lena Fedotova (ravliki on Ravelry)


I have just released my November design, a crocheted top called Merezhka. It takes its name from a Ukrainian traditional embroidery stitch (hem-stitch). This stitch is worked by pulling out strands of thread, which are used to create lacy lines in the fabric (merezhki). Here is what merezhki look like:

Tuesday, November 18, 2014

PROJECT: Lazy Halyna

by Lena Fedotova (ravliki)

This design by Yuliya (MsWeaver) is not a piece of cake to crochet, but all my efforts have been rewarded. Here is my luxury and feminine Lazy Halyna:


Links:

Tuesday, November 11, 2014

PROJECT: Pink Cookies

by Lena Fedotova (ravliki)

I love "tasty" crochet when everything about it (the color, the photos, and the name) remind me of something yummy! If you share this love with me, enjoy these photos of Yuliya's Pink Cookies


Links:

Friday, November 7, 2014

PATTERN RELEASE: Listopad Stole

by Yuliya Tkacheva (MsWeaver)

Do you remember my Purple Gold Scarf, crocheted in a simple Tunisian chevron lace stitch? 
Take that stitch pattern, get rid of the stripes, stagger the eyelets and you arrive at nothing less than a Tunisian version of the well-known knitting leaf stitch!

This is the stitch pattern I used to create my new design Listopad, a Tunisian crochet lace stole.


Instead of the customary approach of using a lacy stitch pattern to border a plain body, I decided to do just the opposite: the leaf stitch pattern forms the main body of the stole and sections of the plain lacy chevron edge it on both sides. It is worked as one piece from one end to the other with no joining in the middle. Since it is worked in one direction, the two ends are not exactly the same, but similar enough to match and look symmetric. 


Tuesday, November 4, 2014

CROCHET MODE: Halyna Cardigan

by Lena Fedotova (ravliki)

Do you wear your crochet tops with canvas shoes or sneakers? Try pairing them in your outfits and you will be surprised how great they look together. You can create many different outfits with the perfect balance of sporty and chic:


Light Floral: Crochet and Keds
Banana Girl


Fast Cherry

Fast Cherry by ravliki  featuring Halyna Cardigan


Links:

Tuesday, October 28, 2014

STORY: Around the World in 80 Skeins (Montenegro)

Kotor, Montenegro

Join us at "Around the World in 80 Skeins", a worldwide blog tour with Kimberly Golynskiy (aka 80skeins)!

She interviews designers from all over the globe and talks about how culture and environment inspires design. There have already been designers from Kuwait, Thailand, Indonesia, South Africa, Malaysia, Mexico, Sri Lanka.

Come and meet Lena talking about Montenegro and Ukraine.

Saturday, October 25, 2014

PATTERN RELEASE: Pond Ripples Collection

by Lena Fedotova (ravliki)

Yesterday I released the final design of my Pond Ripple Collection, Cookies cardigan. The simple beauty of the pattern of circles (which are, in fact, hexagonal motifs) and the illusion of needlepoint embroidery, (which I am so fond of) got me hooked for more than a whole year and made me finish 5 projects based on the same motif.

The first design, Pond Ripples, is a sweater, which can also be a sleeveless top if you prefer it that way. This was the first time I had added a pentagonal motif to the construction of the shoulders, which made this sweater fit like a second skin. This pattern also suggests a few possible modifications with extra layouts for a sleeveless version, a bolero and several neckline options.

Pond Ripples

The second design was Cookies, but I took some time to release it and instead, having itchy hands, started another ripple project, Ink Ripples wrap. This pattern includes four layout diagrams for a scarf, a stole, a shawlette and a shawl.

Ink Ripples

And, finally, Cookies is now live! This cozy cardigan is based on the classic raglan construction, while strategically placed pentagonal motifs are used to create smooth, flowing lines on the fronts, to achieve a straight neckline, and to taper the bottom of the sleeves while still maintaining the continuity of the circular pattern.

Cookies
All three designs are combined into an ebook or can be purchased individually. Happy crocheting!

Sunday, October 12, 2014

HOW TO: Tips on Crochet Slip-Stitching

by Yuliya Tkacheva (MsWeaver)

Slip-stitching is one of my most favourite techniques, which I have used in a number of designs. Testing these patterns in our Ravelry group, I have realised that there are a number of recurring issues, which crocheters seem to encounter when they start out with this technique. I thought that grouping them in one blog post could be a helpful resource for those trying my patterns featuring this technique for the first time. So here we go!

Issue No1: Tightening of Fabric


This seems to be the most common concern with this technique. I believe the key here is to think of a slip stitch as a valid crochet stitch, just like a single crochet, or a double crochet or any other crochet stitch, rather than something you use when tightly joining crochet rounds. So if your fabric does not shrink horizontally when you work a row of single crochet or double crochet, there is no reason why it should with slip stitches. There should be a nice even row of ”V’s” on top, just like there is in a row of single crochet or double crochet, except that the row will be shorter in height, since slip stitches effectively have no “legs”.


To think of it, I have created my La Mar stitch pattern based on the difference in height of various crochet stitches, with slip stitch being the shortest. The longer legs of taller stitches create a beautiful wave in the fabric and each two rows of ”V’s” stacked on top of each other form those textured knit-like “ribs” or “ridges”:


So, when you work the base chain and then the first row of slip stitches on top, if it seems tighter than your base chain, you might be working too tightly. Try again, but this time work your slip stitches as if you were still chaining. It is, in fact, the same row of chains, except that you are joining it to something below. So don’t think about the extra loop on the hook and pretend you are chaining. If your base chains are loose and uniform, there is no reason why your first row of slip stitches should not be.

Issue No2: Not Working Efficiently


I also noticed in a few videos available online that some crocheters tend to stop after they pull through the loop of the row below. So they insert the hook in the stitch, yarn over and pull through the stitch, stop and only then they pull the same loop though the loop on the hook. This looks a lot less efficient and might cause the extra tightening. It is much quicker when you pull through both the stitch below and the loop on the hook in one single motion, just as you would when closing any other stitch. 


Some people compare slip stitching to “crocheting air”. I think what they mean is that it is exactly the same scooping motion you make when crocheting
 the last “YO, pull though two” of any stitch and get that nice and neat “V” on top.

Issue No3: Not Working in Correct Loop 

Depending on which loop you work into and which way you insert your hook when slip-stitching, you can get different-looking results with this technique. In my patterns I have only used one single way of slip-stitching so far: working in the back loop. 

Since there are no legs to separate the top “V”, it might not be immediately clear which one is the back loop. When you work flat (back and forth rows, turning at the end of each row), the simple solution is to mark a few front loops while working the last stitches of the previous row, which, once you turn your work, will become the back loops.


Issue No4: Missing Stitches


Marking the first stitch in a flat row is also a good idea because it is so easy to miss it when you get to it in the next row and when it becomes your last stitch. If you continuously miss it for a few rows you will notice a gradual shrinking in width of your piece as it will become narrower and narrower. So make sure to keep a regular stitch count until you know exactly where that last loop is hiding and you don't miss any stitches.


Issue No5: Messy Edges

While some people do not make raising chains when working rows of slip stitches, I personally do and I also suggest doing that in my patterns. These raising chains, if worked loosely, can look a bit messy on the edges of the fabric. The obvious solution here is to simply tighten them up before working the first stitch of the next row. Also, always turn your piece in the same direction when going from one row to another for an even uniform edge.

Should you prefer not to make raising chains, make sure to mark the first stitch as per the tip above not to miss it.

What Resultant Fabric Should Look and Feel Like


The resultant fabric should not be tight, but plush and squishy. I have been slip-stitching for a while, so I can achieve nice, loose and uniform loops with a fairly small hook. If the hook I listed in my pattern doesn't give you this lush look and feel, go up a hook size or two. We all have different personal techniques, which is why you don’t always get the designer gauge with the same hook size even if you are using the exact same yarn. 


When worked flat in back loops, the fabric should also have plenty of stretch. And this is exactly what I took advantage of when creating my most recent La Mar Cowl:


It is based on the same La Mar stitch pattern featured above, which fuses regular crochet with rows of slip stitches to create a beautiful texture. I have previously used this stitch pattern in my La Mar Hat and have now bundled the two patterns into an ebook, for those who might be interested in both. Although the two patterns are very similar, unlike the hat pattern, which calls for sport- to DK-weight yarn, the cowl pattern suggests using DK- to worsted-weight yarn, so the suggested gauge is different.

If you are only interested in the cowl pattern, there is still an active introductory discount on the individual La Mar Cowl pattern, which is going to be valid until 14 October, 2014.

Happy slip-stitching!

Links:

Cup of Stitches Group on Ravelry
La Mar Cowl
La Mar Hat
La Mar Collection


Friday, October 10, 2014

PATTERN RELEASE: Ink Ripples and Color Questions

by Lena Fedotova (ravliki)

There is one thing that always makes me rack my brain as soon as I put my designer hat on. The color! I always ask myself plenty of questions regarding the color, like:
  • How fresh is this color?
  • Is it trendy or not?
  • Is there too much of this color, perhaps?
For example, many people love shades of blue (me including), so sometimes I feel that I want to avoid it in my designs, simply because there are too many blue designs out there. I love finding fresh colors or unexpected color combos, and enjoy seeing projects in dirty muted colors, which still look wonderfully fresh.

I also always worry about how good the color is going to look in the photos. And whether or not there will be clothes in matching colors in my wardrobe for the final modeled photo-shoot. 

Finally, the most important question I ask myself is whether the color will fit the design and its future name. Sometimes the color tells its own powerful story and this is when I decide to change the design name. This is exactly what happened when I was designing my Ink Ripples.


Thursday, August 28, 2014

PATTERN RELEASE: Honey Weather scarf

by Lena Fedotova (ravliki)

These two projects are one year apart and I can now see how differently I felt about this design a year ago. :) This year I was thinking about sun glitter, warmth and sweet smells in the air - meet Honey Weather, a wider version of the blue scarf.

The beautiful bubbles in the stitch pattern are Lover's knots, combined with standard crochet stitches. Not a complicated stitch at all as you can see here: How to crochet Lover's knot.


Honey Weather album on Flickr


This scarf is very easy to crochet and, as such, is a perfect travel project. If you are experienced in crocheting Lover's knots, the wider version of this scarf will take you less than 10 hours (I spent 6 hours in total).

Even the finishing stage is exciting, as the edge and blocking work wonders with this design. The one-row edging gives it a perfect "wow-effect" finish, and the inner lines become wavy as soon as the longest sides of the scarf are blocked straight. Alternatively, you can straighten the inner lines and let the border remain wavy instead.


Happy crocheting! Enjoy the lovely honey weather! :)

Honey Weather pattern on Ravelry

Wednesday, August 20, 2014

CROCHET MODE: Sun Powder, A Thin Layer of Crochet

by Lena Fedotova (ravliki)

Can a crochet top be a staple piece in your summer wardrobe and fit many of your outfits? Yes, of course! I say "yes" to having this summer experience under my belt . :)

In my opinion, there are two factors which should be borne in mind for a win-win multi-pairing of a summer crochet garment:

1. Color. This should fit the rest of your summer wardrobe. White and black are always the champions, of course, but I personally prefer bold bright colors. And the bolder the better! 

2. Texture, which should be as soft as possible, without any overwhelming individuality. This allows you to combine your crochet piece with clothes of different styles, which don't make you look "boho" all the time.
These are the two things I kept in mind, while designing my Sun Powder top. It is bright in color and has a delicate stitch pattern, which makes it suitable for many outfits.

Here are a few ideas for wearing this top:


Sun Powder


Pannochka: Crochet and Keds


San Tropez


Links:

Monday, July 7, 2014

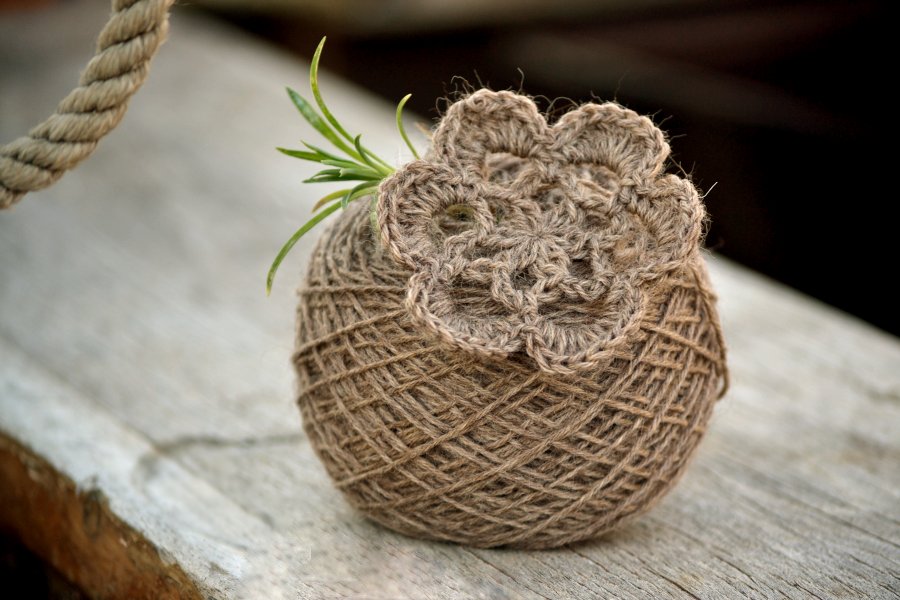
FREE PATTERN: Crochet Flower

This is one of my favorite crochet flowers:


When I want to try out a new yarn (just for fun, because my hands get itchy), I usually make this flower and pin it on top of the ball. And all my cravings, yarnaholic and aesthetic, get completely satisfied. :)

 The instructions and the chart are attached:

Sunday, June 29, 2014

PATTERN RELEASE: Purple Gold Scarf


It’s been awhile since I last crocheted something simple and repetitive, something I could pluck at while semi-watching TV and answering my daughter’s increasingly deeper why-questions (such as, “Mummy, why are you not an astrophysiLcist?”).

So when I saw the purple and gold shades of Fyberspates Lace Scrumptious my designer-self screamed, “Combine!”, but my crocheter-self begged, “Please, keep it simple!” This is how the idea of a lacy Tunisian crochet chevron scarf, Purple Gold, was put together.

There are only a couple of stitches used in this design. Both of them can be found in my Tunisian stitch glossary and are referenced in the pattern for your convenience.

Once you get the initial row, you are pretty much all set and can simply enjoy the growth of the pretty lacy fabric. It is nice enough in a single colour and you might just as well keep it monochromatic (have a look at this gorgeousness by Amanda Ochocki!). But should your heart desire more entertainment, throw in some chevron stripes (more gorgeous projects here)! Stick to the colour sequence suggested in the pattern (it contains a few extra ideas to choose from) or create your own chevrons. And they don’t have to be two-colour! Neither do you have to have any particular plan in mind: simply add a new colour whenever you start feeling bored and see where it takes you.

The size of the scarf can be easily adjusted. Use cotton or any other “cooler” fibre to create a summer stole or go for “warmer” fibres if you want a cosy winter scarf. The design is unisex and suitable for any age.

Happy chevrons,
Yuliya (Ms Weaver)

Tuesday, June 10, 2014

HOW TO: Lovers knot

by Lena Fedotova (ravliki)

Lover's knot is a very simple stitch. It consists of two stitches: a chain and a single crochet in the back ridge of this chain. 


Pic 1. Make a large chain (the size of this chain determines the size of the Lover's knot, so make 
sure it is at least the height of a double crochet stitch or taller)
Pic 2. Insert your hook under the back ridge of the chain. Yo, pull through (2 loops on the hook). 
Pic 3. Yo again, pull through 2 loops on the hook. Lover's knot completed.

Patterns:
Honey Weather
Floral Bubbles
Sun Powder
Thistle Field
Lavender Path

Thursday, May 29, 2014

PATTERN RELEASE: Halyna Shawl

by Yuliya Tkacheva (Ms Weaver)

I love crochet motifs. Love the look, the geometry and the endless designing possibilities they bring. It is one of the things that make crochet so special and something that cannot be as easily and naturally created in other crafts.

However, I hardly ever crochet motif projects. And the reason for this is that I don’t enjoy weaving in ends. I can’t say I hate weaving them in, but on my personal fun scale they are somewhere between doing grocery shopping and filing paper bills. If I can procrastinate or delegate these jobs to someone, I will!

So when I had an idea of designing a motif shawl, I knew that the only way to make sure it saw the light of day, was either to find someone to weave in all those tails for me or to crochet it without "ending up with endless ends". Since tail-weaving addicts are pretty rare, it had to be option number two.

Fortunately, I did not need to invent any new technique as the tail-free motif method has now been around for quite a while. You might know it as "Japanese continuous crochet" from a stitch dictionary by Nihon Vogue Sha or as “seamless crochet” from Kristin Omdahl’s book. The idea is pretty simple: you work a partial motif with an incomplete last round and then make a long chain to reach the centre of the next motif on the right and “build” this new motif around this chain. You don’t complete the last round of this motif either, but make another long chain to start the next motif on the right and so on. Once you have the number of motifs you need for that row, you complete the tops of the motifs one by one, working in the opposite direction from right to left. You reach the first motif, make a long chain and start building the next row on top in the same way, all the while joining adjacent motifs are you go. Sounds long and gibberish, but it is truly ingenious!

So this is the method I used when creating Halyna Shawl. The shawl layout suggested in the pattern will only leave you a couple of ends to weave in: the starting tail and the ending tail. Depending on how you join new skeins, there might be a couple more ends from all additional skeins, but I used this method, which worked for my yarn, so I did not even have those!

You might want to ask me, whether or not someone completely new to this technique can work this pattern. I made every effort to make sure it is possible to crochet the shawl without any prior knowledge of this method. The pattern comes with charts, written out instructions and additional visual support. However, bearing in mind the complexity of the motif itself and the thinness of the yarn used, as well as the limitations of a single pattern (as opposed to a full-blown resource book) you do need to be prepared that this will not be a quick and easy project. But once you get the hang of it, it is easy sailing, and you would be qualified to tackle any other continuous motif project.

As wonderful as it sounds, the method does have a few downsides which I should warn you about. Well, everything comes with a price after all! The biggest one is that if you make a mistake somewhere and only see it after you have crocheted a whole row on top of it, it is hard to fix it without having to rip your work all the way back to where the error is (ask me how I know!). So you do need to be extra vigilant when using this method. (I am yet to try cutting out a continuous motif and removing/replacing it, but, perhaps, not in a Malabrigo Silkpaca shawl!)

Another downside is that after a few continuous rows of motifs it becomes harder to manipulate all this amount of fabric as it starts twisting around the beginning chain of every new motif in a completely unruly fashion.

The obvious solution to this is to instead break the layout into smaller “blocks” or “modules” and crochet them separately, joining them together in the last “pass” (thank you, Lena, for pointing it out!). There will be a few extra ends to weave in, but nothing in comparison to the regular “motif-by-motif” approach. Feel free to do just that!

If you are interested in purchasing this pattern, use coupon code HALYNA25, valid till May 31, 2014, to get 25% off the price.

Happy crocheting!

Saturday, May 3, 2014

PATTERN RELEASE: Grow Your Molecule

by Lena Fedotova (ravliki)

I never know where I am going to find inspiration for my next project. Or what I will get at the end! :)

This time I found it in this lovely white-and-blue country-style fabric. I had a couple of blanket ideas sitting in my sketchbook for a long time, but it was this picture and these colors that finally brought it all together.

After I solved all technical problems and made my swatch number 101, it looked so cheerful, that I forgot about everything and dived into crocheting. I picked up my favorite spring colors (milk, apple green and mint blue) and started crocheting this blanket. I could not put my hook down and sometimes carried on till crazy hours, like 4 a.m., for example. Beware, you won't be able to stop either! :)

And, as it usually happens, I ran out of yarn and needed to start a new blanket, having to pick colors from the yarn I already had in my stash. The colors I had did't really go together very well so I asked my husband for help.

I remember my skeptical feelings about his color choice, but he said, "Don't you see? It will be just gorgeous in the end!" He was so right, wasn't he? :) The Molecule is very molecular, in my opinion!

Don't be afraid to pick any kinds of crazy color combinations. This design will work just great because of the "kaleidoscope effect": mix colors, create geometry and enjoy the beauty. The geometry of this blanket is truly spectacular!

The things I thought were shortcomings, turned out to be the strongest design feature. The concave and convex edges of hexagons and triangles create those perfect circles inside.


The thin border, which outlines the edges of the circles without breaking the geometry, is a lovely finishing touch.

Thank you for reading and happy crocheting!

Links:
Grow Your Molecule Blanket on Ravelry

Tuesday, April 8, 2014

PATTERN RELEASE: Grow Your Flower Blanket

by Lena Fedotova (ravliki)

Grow Your Flower Blanket is one of the two patterns based on the same idea. The idea was to mix together traditional granny squares, triangles and hexagons in order to get interesting visual effects and shapes.

Grow Your Molecule pattern (coming soon!) was the first one and its story will be about the technical aspect of designing and where the designer's job begins. The story of the Flower blanket is all about creativity.

Grow Your Flower Blanket pattern on Ravelry

If a fellow designer turned to me for advice, I would say:
Train yourself with every new design. Brainstorm each individual idea and try to exhaust it in all possible ways. Don't stop even if you think that your idea is great already. There is always an extra-great one!

Monday, March 24, 2014

STORY: From Cowl to Cowl (or alternative uses for projects you're going to frog)

by Lena Fedotova (ravliki)

One of my favorite exercises for boosting creativity is to find non-traditional ways of using standard things.

I remembered it when I got stuck with my hairpin cowl project and had to rip it again and again. I had a few problems with it, but the main one was that hairpin lace didn't hold its shape and turned into a ridiculous mess around my neck. It just didn't want to be a cowl. So I let it be a skirt!


Sometimes it takes awhile to remember that you are allowed to be creative, even a little bit crazy, and look for unusual solutions. That's why a project I started in 2012 was only finished in 2014.

I was crocheting the La Mar hat for myself and loved everything about it, especially the stitch pattern (no one thinks it's crochet!). I finished and sewed my hat very quickly, and the only thing left was to start wearing it. Or at least take a picture of it! And that took me almost two years.

I am not a hat person at all and I don't wear hats. It was wrong to think that having made a great hat I would start wearing them (and look beautiful in them). Of course not! So, what do I do? One day, having been bitten by a creativity bug, I removed the seam on the top of the hat and pulled it down. Just look at it now! Isn't it a great cowl?!

So, if you are not satisfied with your project, try to find an alternate use for it. It works!

Be creative and happy stitches to you all! :)

* * * * * * * * * * * * * * *
Designs shown: 
La Mar Hat by Yuliya Tkacheva
Ocean Samba Skirt by Lena Fedotova

Monday, February 17, 2014

STORY: Thistle Field and Design Simplicity

“Sometimes what makes a design brilliant is its simplicity. 
But in order to achieve this, it may have taken the designer 
quite a lot of work and thinking and trials.” 
(helenemagnusson on Ravelry)


The second design of my Lover's Knot collection, Thistle Field, has been released.

This design taught me a couple of things. First of all, it reminded me how important it was to keep track of my design trials. I made two full-sized samples of this shawl: one in summer (and frogged it) and then another one in autumn, simply because I forgot I had already made the first one. :)

The first shawl sample had a crescent shape and copied the stitch pattern of Lavender Path shawl, although this time the stitch pattern stripes were arranged horizontally:


I was very happy with it ... until I blocked it and saw the finished result. I only failed to consider one thing: the laws of physics! :) The airy lace of Solomon Knots was not able to hold its shape because of the weight of horizontally placed pattern repeats. Each new horizontal stripe added more weight and distorted the look of the upper stripe. "Ha-ha", I thought at the time and, since things like this happen, I frogged the shawl and completely forgot about it until the following autumn.

Wednesday, January 15, 2014

HOW TO: Crochet Cord Tutorial

In the previous post I mentioned a crochet cord, which uses two separate strands at the same time. Here it is:


1. With C1 and C2 yarn at the same time, ch 1 (starting chain).
2. With C1 (blue), wrap it around hook in the direction away from you.
3. With C2 (grey), yo, pull through two loops on hook.
Repeat steps 2-3.

Use the same yarn end for step 2 and wrap it in the same direction each time (see pic. 2 and 4).

5-6. One side of the cord is a chain line (C2), the second side is a thin solid line (C1), and the third side looks like a dotted line (C1 and C2). C2 is the predominant color in the cord, so choose accordingly.

Wednesday, January 8, 2014

STORY: Tunisian Shell Blanket

Tunisian Shell is the first Lena's pattern of 2014. It is a hexagonal blanket, made using the Tunisian crochet technique and short rows. Each shell element of the blanket is small enough to place all of your stitches on a regular crochet hook.

Use coupon code SHELL and get 25% off on this pattern until the end of January 12, 2014.
The pattern assumes basic familiarity with Tunisian crochet, specifically how each row is worked as two separate passes and how to work the Tunisian simple stitch.
 You should also know how to work the crab stitch for the edging of your blanket.

The idea of this blanket didn't suddenly dawn on me and I remember each gentle little step of how this blanket came to life. :) Here is its path:


Related Posts Plugin for WordPress, Blogger...

Printfriendly

Related Posts Plugin for WordPress, Blogger...